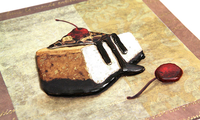
Fake Cake
That looks like a real one!
How to achieve a 3D relief with napkin technique?
Material and tools:
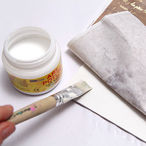
a wooden board, universal primer, softpaper "Cakes" with metallic effect, glue for napkin technique and universal glue, white Plastlight, acrylic paints.
Instructions:
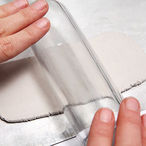
1 Roll flat Plastlight, 2 mm thick.
2 Cut out the motifs from softpaper. You have the same motif printed in 3 different layers on this sheet of paper for 3D technique. Glue them onto the Plastlight using the glue for napkin technique.
3 Cut out the motif with scissors or scalpel when the glue is dry and the Plastlight still moist.
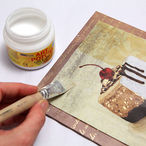
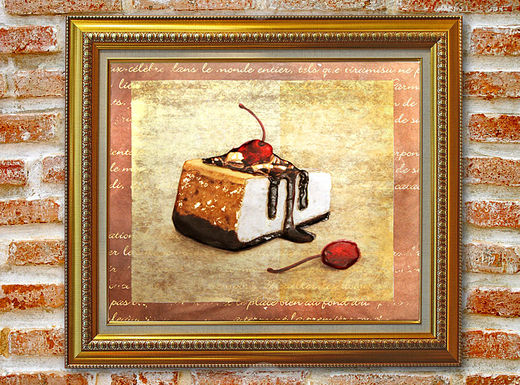
4 Prepare a base while the cake parts are still drying. Cut out the biggest motif with gold letters. Glue it onto the wooden board but be careful not to wrinkle it or leave air bubbles. Fold the paper and glue it over the side edges. If you're working with a smooth base before gluing the paper you should apply universal primer and wait until it's completely dry.
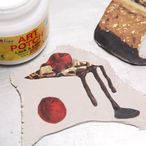
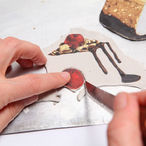
5 Glue the motif with cake which is a few cm narrower.
6 Glue the parts of the cake onto the board. First the whole piece, then the cherry coating and at the end place a cherry near the plate.
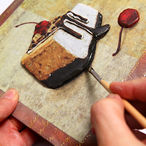
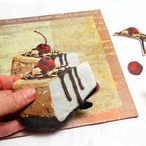
7 Since the white bits of the Plastlight are visible on the sides, paint them with acrylic paint in appropriate shade.
8 Hang a hanger on the back or place the whole board in a bigger frame.
Made by Višnja Skorin