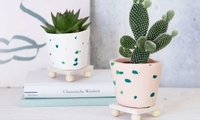
DIY plant stands
Want to add a splash of colour to your window ledge? Looking for a new idea for a lovely housewarming gift?
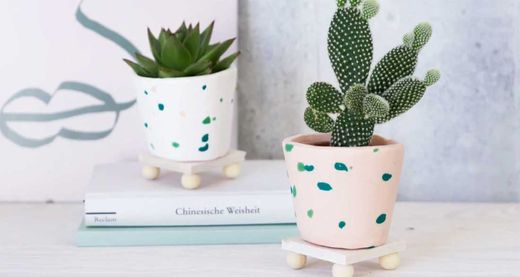
Then home-made plant stands are just what you need. You can make these individual, creative pot holders out of FIMO in no time. And you can make them in whatever design you like! Contrast them with your pot plants or enhance their natural colours. Whether it's in tropical colours or a simple green to fit with a more botanical look, your home made plant stand will really catch the eye. And with FIMO you can create a whole range of patterns. Give it a try!
Step-by-step tutorial
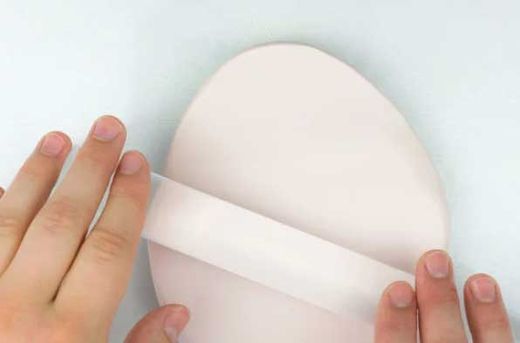
1 Depending on the size of your plant pot holders, knead 1 to 2 blocks of flesh-coloured FIMO soft per pot until soft and roll out into a 5 mm sheet using the acrylic roller.
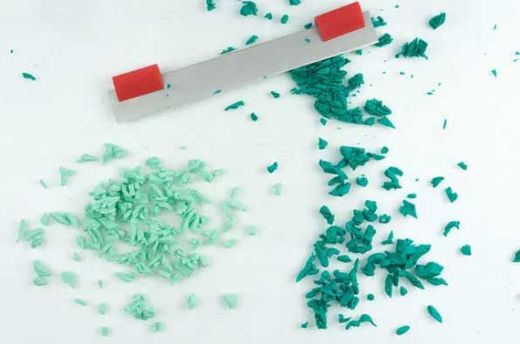
2 Roll out half a block each of FIMO soft emerald and FIMO effect jade green until soft and then into a sheet about 2 - 3 mm thick.
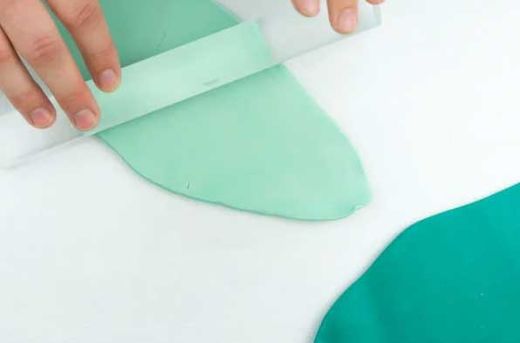
3 Cut part of each green sheet into small shards using the FIMO blade.
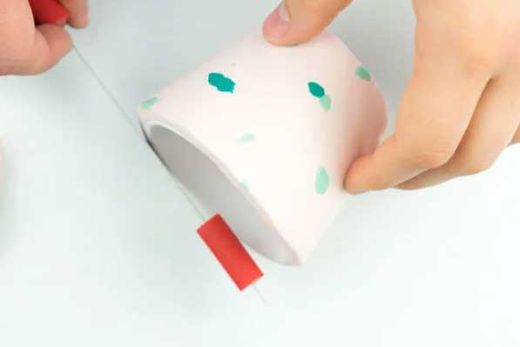
4 Next, place the green FIMO shards on the flesh coloured base sheet to create a terrazzo effect.
Tip: Less is more, and the fragments should not be too neatly arranged.
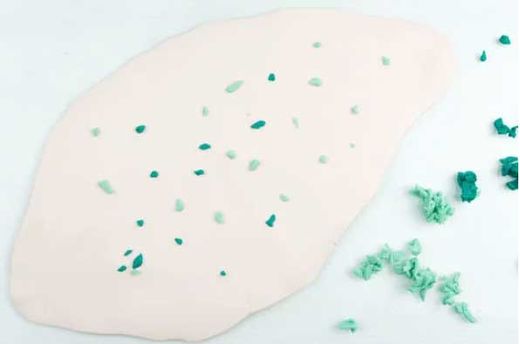
5 Then roll over with the acrylic roller so as to bind the shards with the base sheet and create an even surface.

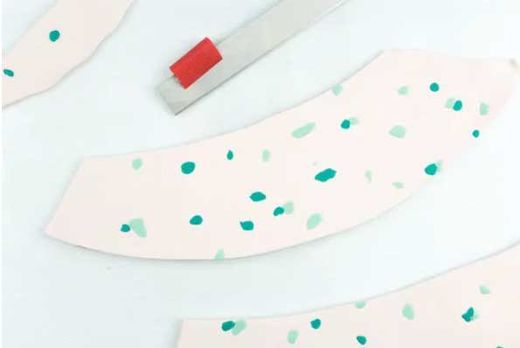
6 Now cut out the rough shape of the plant pot holder from the FIMO sheet.
Tip: Roll the plant pot holder gently once over the modelling clay, creating a faint impression on the clay which you can then cut round roughly with the FIMO blade.
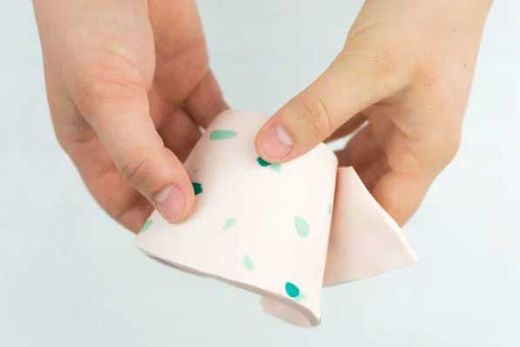
7 Place the trimmed strip around the pot, press down and then cut to the required length. Close the join and smooth it flat.
Tip: To avoid leaving fingerprints on the FIMO, place some baking paper over the join and smooth over it with a finger.
8 Cut off any modelling clay that is protruding over the top of the pot. Smooth the edges with a finger.
9 Next, place the plant pot holder on piece of the remaining FIMO and cut to fit the bottom.
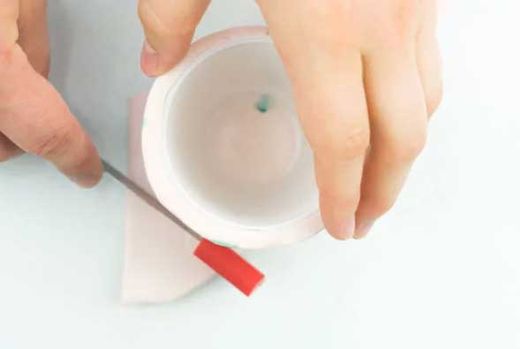
10 Join the seam between the bottom and the sides of the plant pot holder by smoothing it with a finger. Then harden it in the oven for 30 minutes at 110 °C / 230 °F. Leave to cool completely.

11 While your plant pot holder is in the oven, prepare the wooden part of your plant stand. To do this, cut out a square piece of balsa wood using the cutter blade and the ruler. The piece should be big enough to hold the plant pot holder.

12 Attach the small wooden beads to the piece of wood using the wood glue.
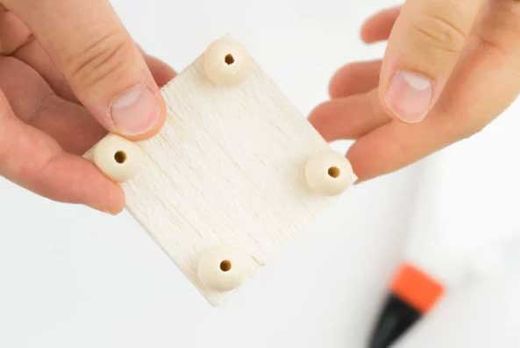
Once your plant pot holder has cooled, it can be placed on the wooden pedestal.
Idea, photo and text: Luisa, Staedtler GmbH