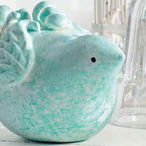
Lovely birds in soft pastel shades
Delicate, fine and elegant-looking. Are these pretty birds made out of ceramic or porcelain?
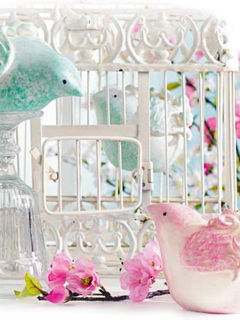
They may look like they are, but these small feathered friends
are actually made
out of FIMOair light. You too can make them – no oven required.
Delightful
decorations for your home.
Material and tools:
FIMOair light 250g, Modelling tools, Grind’n polish Set, Gloss
varnish.
You will also require:
7 plastic bread bags, masking tape (removable adhesive tape),
vessel with narrow opening, e.g. a glass, acrylic paint in light
pink or light blue, sponge for dabbing on paint, fine brush for
the eyes, brush for varnishing.
Instructions for the deco birds:
1
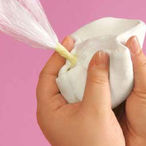
To make one bird, begin by rolling six plastic bread bags up to a ball. Place this ball inside another bag and seal the outer bag at the top with masking tape. For each bird, knead approx. 200g FIMOair light clay well, shape to a ball, flatten and press around the plastic ball. The opening of the bag sticks out underneath and can be stuck into the narrow opening of your vessel for the next steps. This keeps the bird more stable while you work on it and the indent made by the rim of the glass clearly marks the round opening required later.
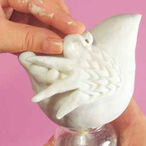
2
Smooth over the modelling clay. You may want to moisten your fingers with a little water first. Now create a small head with a pointed beak. Shape the rear end of the bird to point upwards and taper slightly. Make five small balls for the ‚tail feathers', place them in position and smooth them out towards the end. Use the remaining FIMOair light to form two flat basic wing shapes with four or five long points. Moisten their backs slightly, add the wings to the left and right of the body and press on gently. Smooth over the edges well.
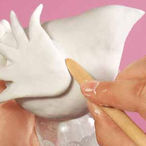
3
Use a pointed modelling tool or kitchen knife to add a
feather-like pattern to the wings.
Then curl the tips of the wings a little. Create the eyes using a
round modelling tool (or skewer). Leave the bird to dry for one
day (24 hours).
Tip: Unfinished items and left-over bits of material can be
stored in a sealed plastic bag or airtight container, e.g. a
plastic box or jar.
4
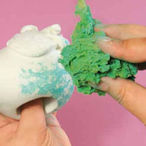
Next, remove the bird from the supporting vessel. Cut into the modelling clay along the round indented edge taking care not to cut the bag. Remove the clay inside the circle so that you are left with an opening at the base of the bird. You can now see the taped-up plastic ball. Remove the masking tape from the outer bag. Open the bag and pull out the plastic inside. Then free the outer bag and pull it out too. Allow the bird to dry again (inside). Sand over the surface of the bird using fine-grained sandpaper. Paint the bird either all over or just in places by dabbing acrylic paint on using an almost dry large-pored sponge.
5
Add dark paint to the eye sockets using a fine brush. After the paint has completely dried, cover the bird with several coats of gloss varnish.
Tip:
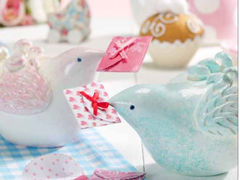
These adorable birds can also be used as letter carriers: Cut a
small slit across the beak of the hardened bird using a kitchen
knife. Place a mini envelope between the two halves of the
beak. The envelope could contain a personal greeting or message.
The birds also make attractive table decorations – simply
use the envelopes as place cards.
Photo and text: Staedtler GmbH