Sculpey III Snow Fairy Plaque
Let the magic of winter add a bit of whimsy winter.
Do not use unbaked clay on unprotected furniture or finished surfaces. Start with clean hands and work surface area. Good work surfaces include wax paper, metal baking sheet, or disposable foil. Knead clay until soft and smooth. For best results, clean your hands in between colors. Shape clay, pressing pieces together firmly. Bake on oven-proof glass or metal surface at 275°F (130°C) for 30 minutes per ¼" (6 mm) thickness. For best baking results, use an oven thermometer. DO NOT USE MICROWAVE OVEN. DO NOT EXCEED THE ABOVE TEMPERATURE OR RECOMMENDED BAKING TIME. Wash hands after use. Baking should be completed by an adult.
Instructions:
1 Put Translucent Liquid Sculpey on canvas.
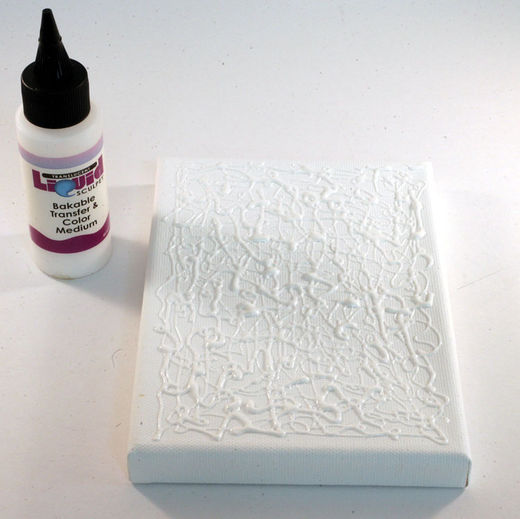
2 Using one finger, smear the Translucent Liquid Sculpey into an even coat. Use a baby wipe to clean your finger.
3 Using a toothpick as a "spatula" drip a small amount of Pearl Ex mica powder onto the wet Translucent Liquid Sculpey Layer.
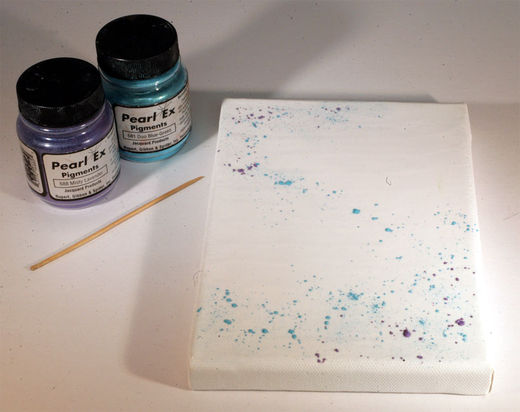
4 Smear the Pearl Ex powder into the wet TLS with one finger. Clean finger with baby wipe.
5 You can have the entire surface of canvas covered with color, or only partial.

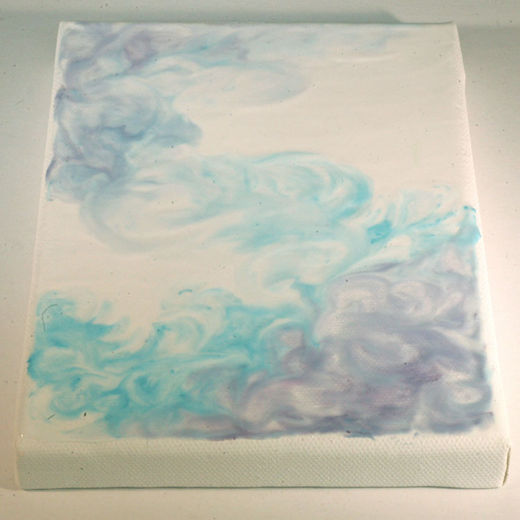
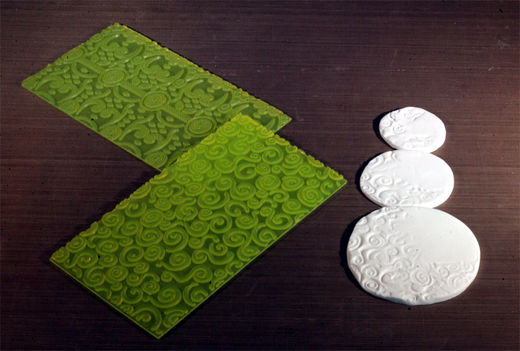
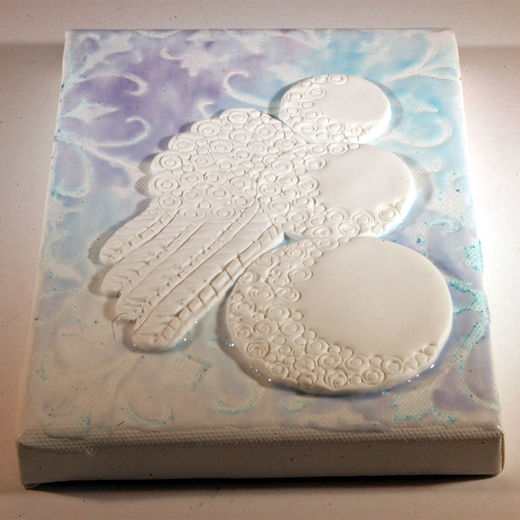
6 Use a clean, dry foam stamp and press down into wet TLS. Lift straight up, removing some of the TLS. This will give you an imprint the shape of the stamp. Clean stamp with baby wipe. Set aside.
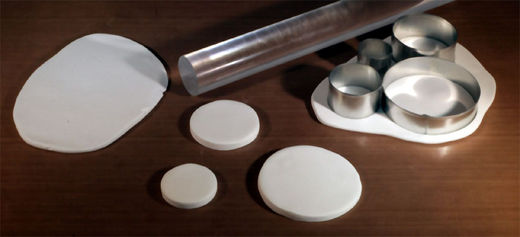
7 Properly condition White Sculpey III clay. Roll out to about 1/8 inch thickness. (Sculpey Ultralight may also be used.) Use various sized round cutters or bottle lids to cut out circles. Smooth circle edges.
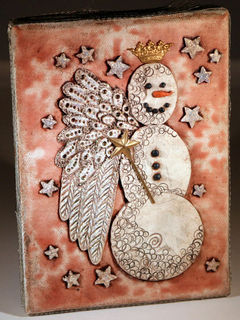
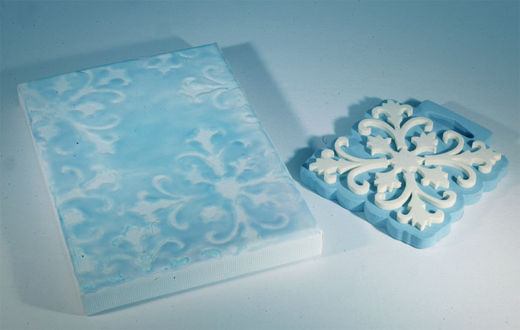
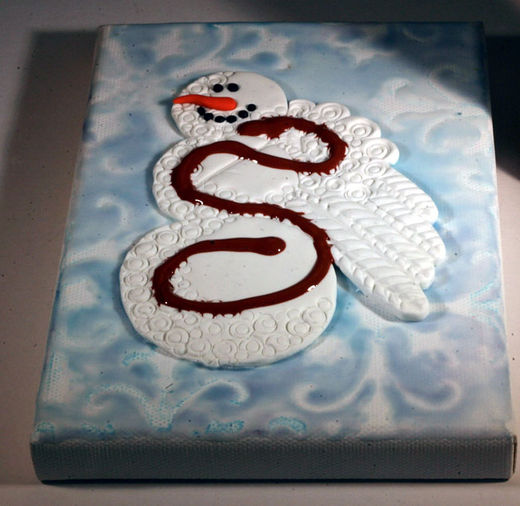
8 Stack your circles to form Snowman. Use Sculpey Texture Sheets to press a design into one side of the snowman (mist the pattern sheet with clean water before impressing, to help release easier). Curve up the sides a bit to give a rounded contour.
9 Use a piece of cardboard (I used a cereal box) to draw a wing shape. Cut wing shape out with scissors.
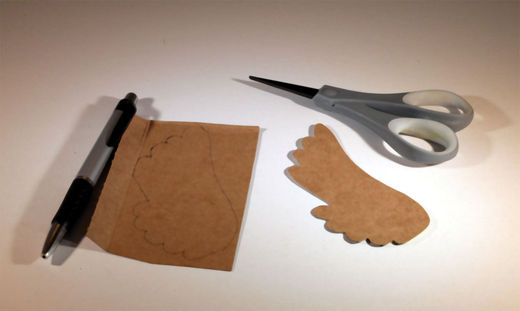
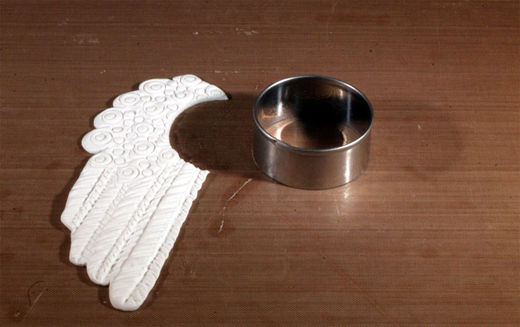
10 Roll out a large piece of clay to 1/8 inch thick. Place cardboard wing shape on top of clay, and using a clay blade, cut around the shape, giving you a nice clean wing shape of clay. Smooth edges. Using the Etch n Pearl tools, add lines, and circle for patterning.
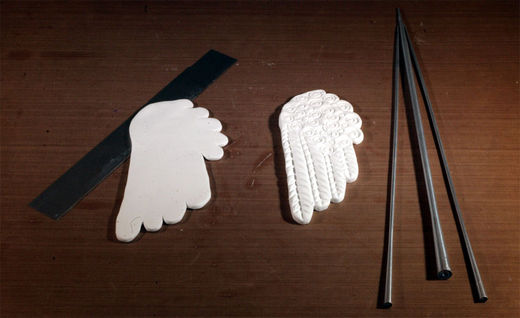
11 Using the middle size cutter, cut a semi circle out of the decorated wing shape. This is where the wing will attach to the body.
12 Lay the snowman down carefully onto the wet TLS on the canvas. Use caution, where it goes down is where it will stay. If you try to move it, it will mess up the pattern in the wet TLS. Now position the wing. GENTLY use your fingers to press snowman and wing down fully. You want it to make 100% contact with the canvas, or air bubbles will form underneath.
13 Using properly conditioned Black and Orange Sculpey III roll out a little noses and lumps for the coal eyes and buttons.
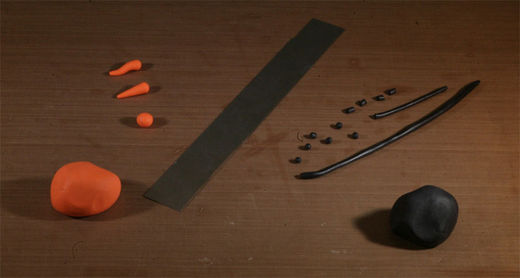
14 Use a toothpick to put a dot of TLS under each nose, eye, or mouth piece before gently pressing to secure to the snowman. Twig arms made from Brown clay and adhered with TLS make for interesting attitudes for your snowman.
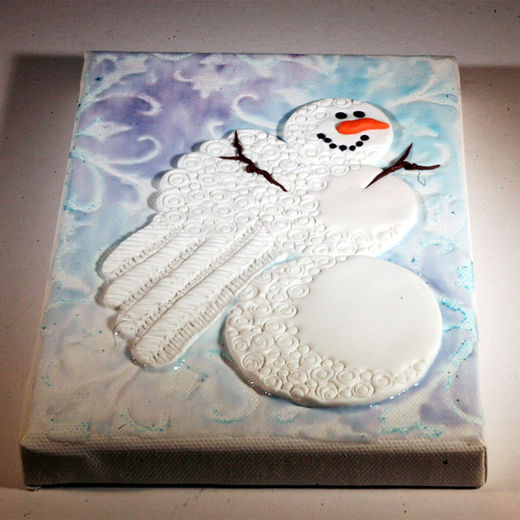
15 A scarf, colorful buttons, and halo, all made from clay as well. If you are going to add plastic charms later, press them gently into the clay to leave a slight impression. Then remove charm for baking.
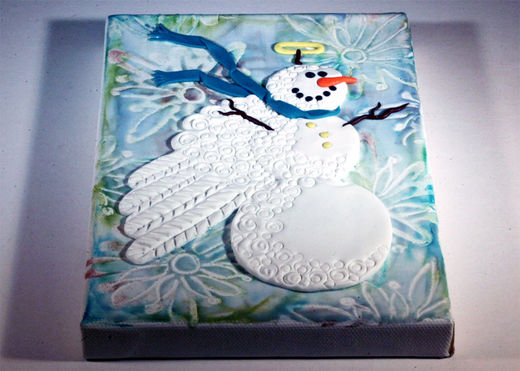
16 Or maybe your snow fairy prefers a crown and stars! The metallic colors of clay look lovely and add so much personality! When you have your snow fairy just the way you like them, bake according to the directions above.

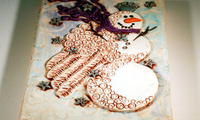
17 Once baked, let cool completely. Then squirt a bit of Acrylic glaze on top of your baked snow fairy. Here I used Goldens brand Burnt Sienna for an antiqued feel, but any color glaze will work to bring out the pattern. (Notice where the charm for a wand was pressed in and removed before baking.)
18 Smear the acrylic glaze all over the canvas and snow fairy. Quickly wipe off excess with a paper towel, leaving only the glaze in the deep depressions of the texture.
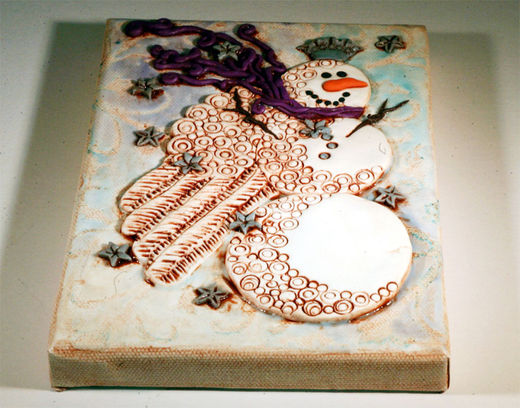
A touch of glitter, and adhering the charms with glue is all that is left to be finished.
Idea, photo and text: Polyform